Showing posts with label Red Hat. Show all posts

Wednesday, December 21, 2011

How to Upgrade Oracle Enterprise Manager Grid Control Release 11.1.0.1 to Oracle Enterprise Manager Cloud Control Release 12.1.0.1

In the name of Allah, Most Gracious, Most Merciful.

In this article i will describe "How to upgrade Oracle Enterprise Manager Grid Control Release 11.1.0.1 to Oracle Enterprise Manager Cloud Control Release 12.1.0.1" on Red Hat Linux 5.3 OS. For this you have to download Oracle Enterprise Manager Cloud Control 12cR1 from oracle website http://www.oracle.com/technetwork/oem/grid-control/downloads/index.html

Pre-Upgrade Tasks
1. Apply patch 13434531 on OMS Home.
2. Using Upgrade Control select the upgrade approach.
3. Upgrade the Grid Control 11gR1 to Cloud Control 12cR1

Download the patch 13434531 from "My Oracle Support" and unzip it. Follow the instruction in README.txt to successfully apply the patch.
 
$ cd /u01/oracle/Middleware/agent11g/bin
$ ./emctl stop agent
$ cd /u01/oracle/Middleware/oms11g/bin
$ ./emctl stop oms
$ export ORACLE_HOME=/u01/oracle/Middleware/oms11g
$ cd /Uninstall/13434531
$ $ORACLE_HOME/OPatch/opatch apply

Figure - 1

$ cd /u01/oracle/Middleware/oms11g/bin
$ ./emctl start oms
$ cd /u01/oracle/Middleware/agent11g/bin
$ ./emctl start agent

Open the Grid Control in a browser and under Deployments tab select the upgrade control as shown in figure below

Figure - 2

Under "Select Upgrade type link" select "1-System" as in this case all the components on grid control is on one system.

Under "Preupgrade steps" click "Overview". On Overview page click Save and then Back

Under "Preupgrade steps" click Manager Software. Under "Provide Software Location" heading provide the plugins patch as shown in figure below.
 
Figure - 3
 
Now run the runInstaller of the Enterprise Manager 12c Software
Figure - 4
Un-check the check box and click Next button.

Figure - 5

Click Yes.

Figure - 6

Select "Skip" option and click Next.

Figure - 7

Click Next.

Figure - 8

Select "upgrade" option and "One System Upgrade". Select the grid control you want to upgrade and provide new Middleware home in the "Middleware Home Location" path. Click Next.

Figure - 9

Enter password for "SYS" and "SYSMAN" users for repository database.

Figure - 10

Copy the emkey to the repository as shown in the figure above and click "Next" again on the Figure - 9

Figure - 11

Click "Yes" on the above screen and "Next" on Figure - 9

Figure - 12

unlock and unexpire the ORACLE_OCM user and click OK on screen above and Next on Figure - 9


Figure - 13

Select all the plugins and click Next.

Figure - 14

Provide WebLogic username and password and click Next.

Figure - 16

Review the Summary and click Install.
 
Figure - 17

View Progress.

Figure - 18 

View Progress.

Figure - 19

View Progress.

Figure - 20

Open a terminal, login with root and execute above mentioned script

$ export ORACLE_HOME=/u01/oracle/Middleware/oms11g
$ su - root
$ /u01/oracle/Middleware12c/oms/allroot.sh

Figure - 21

Click Close and open the URL of Enterprise Manager Cloud Control in a browser.

Figure - 22

Provide SYSMAN and its password and lick Login.

Figure - 23

 Click "Select as my home" button under Summary section.

Figure - 24

Oracle Enterprise Manager Grid Control 11.1.0.1 is upgraded to Oracle Enterprise Manager Cloud Control 12.1.0.1

Insha-Allah this will help and serve the purpose. For any corrections and improvements please suggest.


Friday, October 28, 2011

How to Upgrade Oracle Enterprise Manager Grid Control Release 10.2.0.4 to 11.1.0.1

In the name of Allah, Most Gracious, Most Merciful.

In this article i will describe "How to upgrade Oracle Enterprise Manager Grid Control Release 10.2.0.4 to 11.1.0.1" on Red Hat Linux 5.3 OS. For this you have to download Oracle Enterprise Manager Grid Control 11gR1 from oracle website http://www.oracle.com/technetwork/oem/grid-control/downloads/index.htm 
Pre-Upgrade Tasks

1. Oracle WebLogic Server 10.3.2 should be installed. Guide available here
2. Upgrade the repository database to Oracle 11gR2. Guide available here
3. Take Cold backup of repository database.
4. Switch the repository database to archive log mode. (not mandatory)
5. Stop the OMS and agent connected to the repository database.
6. set parameter job_queue_processes to 0 for the duration of upgrade.
7. set parameter log_buffer parameter to 10485760 or higher.
8. set parameter processes to 500 or higher.
9. Grant execute on DBMS_RANDOM to SYSMAN and DBSNMP users.


Execute following query to see the log mode of the database.

$ sqlplus / as sysdba
SQL> select log_mode from v$database;
LOG_MODE
-----------
ARCHIVELOG


if it is in NOARCHIVELOG then execute following script to switch it to archivelog mode.

$ sqlplus / as sysdba
SQL> shutdown immediate;
SQL> startup mount;
SQL> alter database archivelog;
SQL> alter database open;

Stop OMS and agents connected to the repository database by following commands

$ $<OMS_HOME>/opmn/bin/opmnctl stopall
$ $<AGENT_HOME>/bin/emctl stop agent

Set database parameters and grants by following script

$ sqlplus / as sysdba
SQL> alter system set job_queue_processes=0;
SQL> alter system set log_buffer=10485760 scope=spfile;
SQL> alter system set processes=500 scope=spfile;
SQL> grant execute on DBMS_RANDOM to SYSMAN, DBSNMP;
SQL> shutdown immediate;
SQL> startup;

Upgrade Tasks


Unzip the installation source and start the installer by running following command


$ cd /tmp/GridControl
$ unzip GridControl_11.1.0.1.0_Linux_1of3.zip
$ unzip GridControl_11.1.0.1.0_Linux_2of3.zip
$ unzip GridControl_11.1.0.1.0_Linux_3of3.zip 

$ ./runInstaller

Figure - 1

Leave the email and support password blank and click Next.


Figure - 2

Click Yes.


Figure - 3

Click the "Skip Software Updates" and then click Next.


Figure - 4


Click "Upgrade to Enterprise Manager 11g" and then click Next.


Figure - 5

Select the Enterprise Manager 10g you want to upgrade and click Next.


Figure - 6


If all the tests are succeeded then click Next otherwise check and fix the problem.


Figure - 7


Enter the SYS users password for the repository database and click Next.


Figure - 8

Click Next.


Figure - 9

Enter WebLogic username and passwords and click Next.


Figure - 10


Click Next.


Figure - 11

Review information and click Install.


Figure - 12


View Progress.


Figure - 13

View Progress.


Figure - 14


View Progress.


Figure - 15


Open a new terminal, login with root, make a directory for oracle files and run the script in the above figure.

$ mkdir /usr/local/bin/gc11g
$ /u01/oracle/Middleware/oms11g/allroot.sh


Figure - 16


Provide the directory path created above when prompted then click OK on figure 15.


Figure - 17

View Progress.


Figure - 18


View Progress.


Figure - 19

Note the Enterprise Manager URL and then click Close. Open the URL in brower.


Figure - 20


Enter username and password for repository database and click Login.


Figure - 21


Oracle Enterprise Manager Grid Control Release 10.2.0.4 is upgraded to 11.1.0.1.

Post-Upgrade Tasks


Reset the job_queue_processes parameter.


$ sqlplus / as sysdba
SQL> alter system set job_queue_processes=10;
SQL> exit;

Insha-Allah this will help and serve the purpose. For any corrections and improvements please suggest.

Monday, October 24, 2011

How to install Oracle WebLogic Server 10.3.2 on Red Hat Enterprise Linux 5.3

In this article I will describe the installation of Oracle WebLogic Server 10.3.2 on Red Hat Enterprise Linux 5.3 OS. Download wls1032_linux32.bin from oracle website and copy to a /tmp folder. Run the installer as follows.


$ cd /tmp
$ ./wls1032_linux32.bin


Figure - 1

Click Next.


Figure - 2


Enter Middleware Home Directory path and click Next.


Figure - 3

Uncheck Oracle Support Check Box and click Next.


Figure - 4

Choose "Typical" Installation and click Next.

Figure - 5


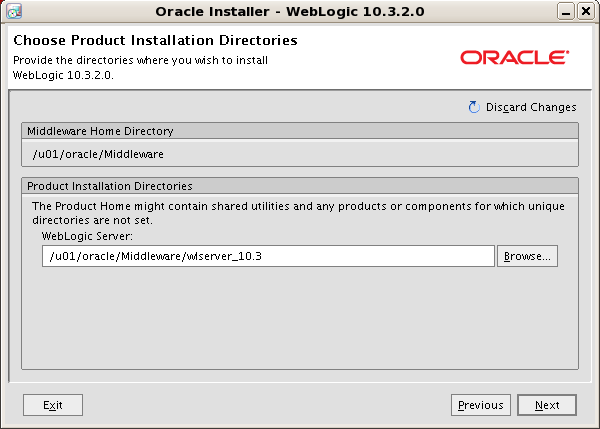
Click Next.


Figure - 6

Click Next.


Figure - 7


View Progress.


Figure - 8


Uncheck "Run Quickstart" and click Done. Run the config.sh file from <MIDDLE_HOME>/wlserver_10.3/common/bin directory as shown in figure below.


Figure - 9


Configuration screen appears.


Figure - 10
 Check "Create a new WebLogic domain" box and click Next.


Figure - 11


Check "WebLogic Advanced Web Services Extension" and click Next.


Figure - 12


Enter Domain name and click Next.


Figure - 13


Enter User Name and Password for administrator user and click Next.


Figure - 14

Provide at least Jdk 1.6 update 18 and click Next. If Jdk is not already installed then install Jdk first.


Figure - 15


Check "Administration Server" and click Next.


Figure - 16

Enter information as in above screen and click Next.


Figure - 17


Review information and click Create.


Figure - 18

View Progress.


Figure - 19


Click Done. Change directory to <MIDDLE_HOME>/user_projects/domains/mydomain and run startWebLogic.sh file as follows.


Figure - 20
One WebLogic Server is started enter the URL in browser as follows. http://127.0.0.1:7001/console


Figure - 21

Provide admin user's password and click Login. Oracle WebLogic Server 11g Administration home page will appear as follows.


Figure - 22


Oracle WebLogic Server 11g 10.3.2.0 is installed.


Insha-Allah this will help and serve the purpose. For any corrections and improvements please suggest.