In the name of Allah, Most Gracious, Most Merciful.
In this article I will describe the installation of Oracle Enterprise Manager Cloud Control 12c 12.1.0.1.0 64-bit installation On Oracle Solaris 10 64-bit. Before proceeding make sure that repository database is already installed. You can find the 11gR2 database installation here. Installation of database completes most of the system parameter settings.
In this article I will describe the installation of Oracle Enterprise Manager Cloud Control 12c 12.1.0.1.0 64-bit installation On Oracle Solaris 10 64-bit. Before proceeding make sure that repository database is already installed. You can find the 11gR2 database installation here. Installation of database completes most of the system parameter settings.
Before installation of Enterprise Manager you need to de-configure the database control repository from the above installed database. Run the following command from "oracle" user to do so.
$ emca -deconfig dbcontrol db -repos drop
Provide sys and sysman user passwords when prompted. Backup the spfile and execute the following commands on terminal.
sqlplus / AS SYSDBA
ALTER SYSTEM SET processes=300 SCOPE=SPFILE;
ALTER SYSTEM SET session_cached_cursors=200 SCOPE=SPFILE;
ALTER SYSTEM SET job_queue_processes=20 SCOPE=SPFILE;
SHUTDOWN IMMEDIATE
STARTUP
Download the Enterprise Manager Cloud Control 12c 12.1.0.1.0 64-bit for Solaris 64-bit and extract it.
cd /export/home/oracle
$ unzip em12_solarisx64_disk1of2.zip
$ unzip em12_solarisx64_disk2of2.zip
$ ./runInstaller
 |
| Figure - 1 |
Un-check the security updates check box and click Next.
 |
| Figure - 2 |
Click Yes.
 | ||
| Figure - 3 |
Select the "Skip" radio option and click Next.
 |
| Figure - 4 |
Click Next.
 |
| Figure - 5 |
Select "Advanced" option in "Create a new Enterprise Manager System" option. Provide Middleware Home Location and click Next.
 |
| Figure - 6 |
Select the management capabilities of your choice and click Next.
 |
| Figure - 7 |
Provide Weblogic and Nodemanager information and click Next.
 |
| Figure - 8 |
Provide installed database connection information and click Next.
 |
| Figure - 9 |
Click Yes.
 |
| Figure - 10 |
Click Yes.
 |
| Figure - 11 |
Provide sysman's password and oms registration password and click Next.
 |
| Figure - 12 |
Click Next.
 |
| Figure - 13 |
Review information and click Next.
 |
| Figure - 14 |
Review information and click Next.
 |
| Figure - 15 |
Review progress.
 |
| Figure - 16 |
Review progress.
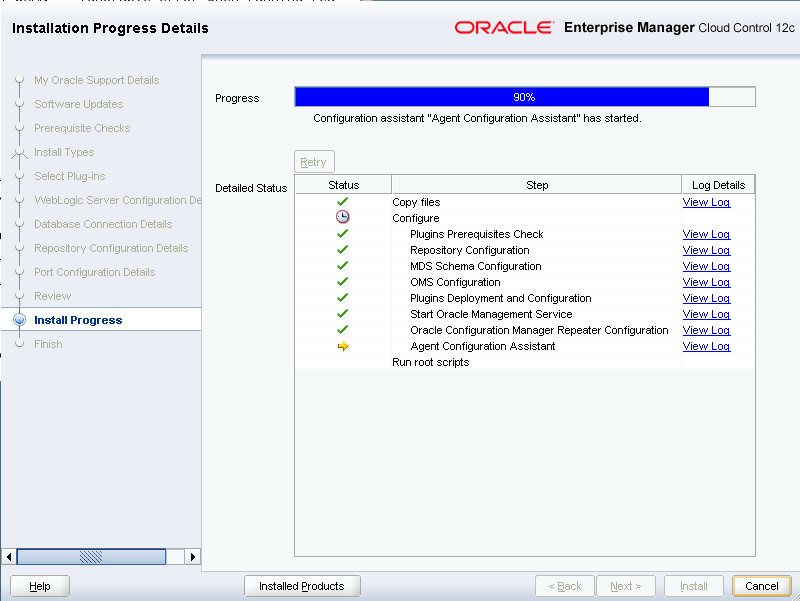 |
| Figure - 17 |
Review progress.
 |
| Figure - 18 |
Open a terminal and run the above mentioned script with "root" user.
 |
| Figure - 19 |
Review information, copy Enterprise Manager Cloud Control URL and paste in a browser.
 |
| Figure - 20 |
Enter sysman and its password and click Login.
 |
| Figure - 21 |
Add following variables in oracle user's profile.
ORACLE_BASE=/u01/app/oracle
export ORACLE_BASE
ORACLE_HOME=$ORACLE_BASE/product/11.2.0.3/db_1
export ORACLE_HOME
OMS_HOME=$ORACLE_BASE/middleware/oms
export OMS_HOME
AGENT_HOME=$ORACLE_BASE/middleware/agent/core/12.1.0.1.0
export AGENT_HOME
Start Enterprise Manager by executing following commands.
$ cd ~
$ . ./.profile
$ORACLE_HOME/bin/dbstart $ORACLE_HOME
$OMS_HOME/bin/emctl start oms
$AGENT_HOME/bin/emctl start agent
Stop Enterprise Manager by executing following commands.
$OMS_HOME/bin/emctl stop oms -all
$AGENT_HOME/bin/emctl stop agent
$ORACLE_HOME/bin/dbshut $ORACLE_HOME
Insha-Allah this will help and serve the purpose. For any corrections and improvements please suggest.


