In the name of Allah, Most Gracious, Most Merciful.
In this article i will describe "How to upgrade Oracle Database Release 10.2.0.4 to 11.2.0.1" on Red Hat Linux 5.3 OS. For this purpose you have to install 11g R2 software and then upgrade the database by using dbua utility. Shutdown the database and take cold backup of database files and spfile.
In this article i will describe "How to upgrade Oracle Database Release 10.2.0.4 to 11.2.0.1" on Red Hat Linux 5.3 OS. For this purpose you have to install 11g R2 software and then upgrade the database by using dbua utility. Shutdown the database and take cold backup of database files and spfile.
$ sqlplus / as sysdba
shutdown immediate;
exit;
$ lsnrctl stop
Backup Database files including control files, redo log files, data files and system parameter files (spfile).
Prerequisites
1. Make directory for 11gR2 software installation by logging with user "oracle".
1. Make directory for 11gR2 software installation by logging with user "oracle".
mkdir -p /u01/oracle/product/11.2.0/db_1
2. Make directory for 11gr2 software zip files by "root" user.
3. Copy 11gr2 software zip files to /tmp/11gr2
4. Unzip the installation zip files to /tmp/11gr2 directory by logging with user "oracle".
$ cd /tmp/11gr2
$ mkdir /tmp/11gr2
$ chown -R oracle:oinstall /tmp/11gr23. Copy 11gr2 software zip files to /tmp/11gr2
4. Unzip the installation zip files to /tmp/11gr2 directory by logging with user "oracle".
$ cd /tmp/11gr2
$ unzip linux_11gR2_database_1of2.zip
5. Run setup by running following command.
Installation
Click Next.
Click Yes.
Click "Install database software only" and then click Next.
Click "Single Instance database installation" and click Next.
Click Next.
Click Next.
Provide "Oracle Base" path and "Software Location" path and click Next.
Click Next.
Login with root user and edit the /etc/sysctl.conf file and update the parameter "ip_local_port_range" parameter to 9000 65500
$ vi /etc/sysctl.conf
Apply these setting by running following command
$ /sbin/sysctl -p
Now click "Check Again" button on Figure - 9.
Review information and click Finish.
$ unzip linux_11gR2_database_2of2.zip
5. Run setup by running following command.
$ cd database
$ ./runInstaller
Installation
 |
| Figure - 1 |
Click Next.
 |
| Figure - 2 |
Click Yes.
 |
| Figure - 3 |
Click "Install database software only" and then click Next.
 |
| Figure - 4 |
Click "Single Instance database installation" and click Next.
 |
| Figure - 5 |
Click Next.
 |
| Figure - 6 |
Click Next.
 |
| Figure - 7 |
Provide "Oracle Base" path and "Software Location" path and click Next.
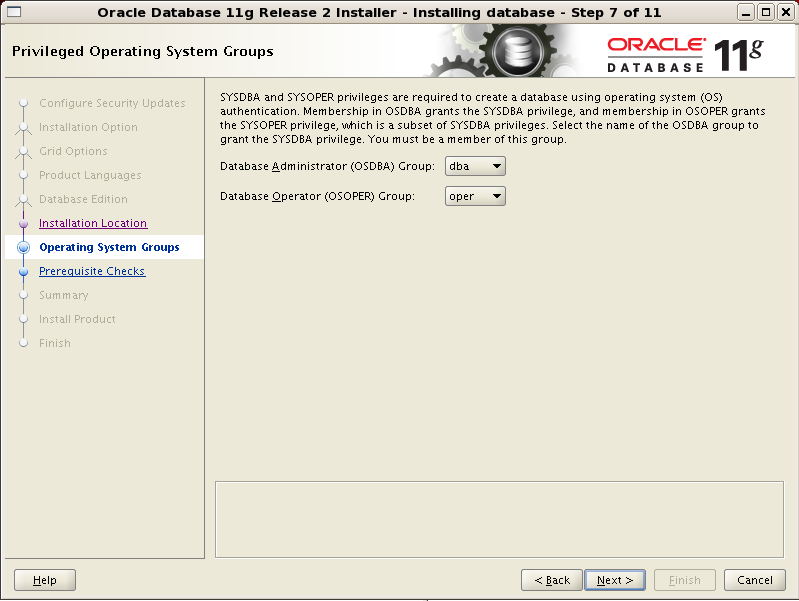 |
| Figure - 8 |
Click Next.
 |
| Figure - 9 |
Login with root user and edit the /etc/sysctl.conf file and update the parameter "ip_local_port_range" parameter to 9000 65500
$ vi /etc/sysctl.conf
Apply these setting by running following command
$ /sbin/sysctl -p
 |
| Figure - 10 |
Now click "Check Again" button on Figure - 9.
 |
| Figure - 11 |
Review information and click Finish.
 |
| Figure - 12 |
View progress.
 |
| Figure - 13 |
Open a new terminal and login with root user and create a directory with following command and run the script in above figure - 13.
$ mkdir -p /usr/local/bin/11gdb
$ /u01/oracle/product/11.2.0/db_1/root.sh
 |
| Figure - 14 |
 |
| Figure - 15 |
Click Close to finish 11gr2 software installation.
Upgradation
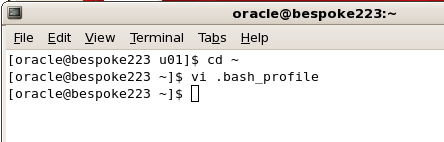
Update the ORACLE_HOME in oracle's bash profile
$ cd ~
$ vi .bash_profile
 |
| Figure - 16 |
 |
| Figure - 17 |
Apply these settings by running following command.
$ . ./.bash_profile
 |
| Figure - 18 |
Run dbua utility as follows.
 |
| Figure - 19 |
Following welcome screen will appear.
 |
| Figure - 20 |
Click Next.
 |
| Figure - 21 |
Select database to upgrade and click Next.
 |
| Figure - 22 |
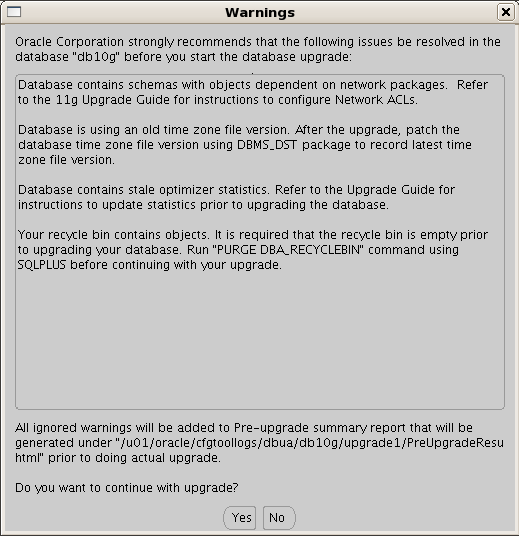
Purge deleted objects from Recycle bin.
 | |
| Figure - 23 |
 |
| Figure - 24 |
Select higher degree of parallelism for invalid objects compilation and turn off archiving for the duration of upgrade and click Next.
 |
| Figure - 25 |
Click Next.
 |
| Figure - 26 |
Click Next.
 |
| Figure - 27 |
Review upgrade summary and click Finish
 |
| Figure - 28 |
View progress.
 |
| Figure - 29 |
View Progress.
 |
| Figure - 30 |
View Progress.
 |
| Figure - 31 |
View Progress.
 |
| Figure - 32 |
View upgrade results.
Oracle Database Release 10.2.0.4 is upgraded to Oracle 11g Release 2 11.2.0.1.
Insha-Allah this will help and serve the purpose. For any corrections and improvements please suggest.


